This is an explanation of the steps I use to cast my bronze miniatures. Here is a picture of the Silicon Bronze metal cubes I use to cast with. Also notice I am melting down previous castings and what they call "buttons" which is the bronze base that the sprues are attached to. When casting, you always need more metal than the sculpture requires. Without the extra metal, the sculpture will not cast well. Fortunately, the bronze can be reused and mixed with some new metal for casting.
Next, the hot flasks are removed from the oven one at a time and placed into a centrifugal casting machine. The correct amount of bronze cubes are added to the crucible and then heated with a torch to about 1850 degrees.
When the bronze is melted and flowing, some flux is added and when perfect, the machine is released, spinning the molten bronze into the cavities in the flasks. Here is a picture of the machine spinning.
After the machine spins for about two minutes, the hot flask is removed and allowed to cool for about 10 minutes. Here the flask is sitting on a firebrick.
After about 10 minutes, the very hot flask is quenched in cold water. This is a violent reaction of the heat meeting the cold water but is a necessary step to strengthen the bronze. This steamy reaction also helps push the investment material off the bronze castings.
Here is what the bronze casting looks like coming out of the flask. Notice there is still a lot of the white investment material so it doesn't look like much.
The casting process is repeated over and over again until all the flasks are cast one at a time. Here is the complete casting. Took me about 15 hours but there were some breaks in there.
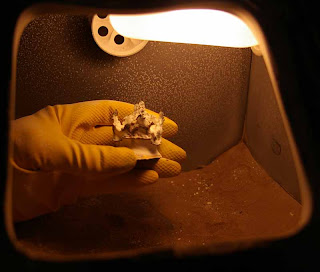
Now the bronze castings need to be cleaned to remove the investment material and fire scale. I used to take a toothbrush and work each one by hand, but that was too time consuming. Then I used to power wash them clean, but that is hard to do in the winter. So now the best way is to sandblast them. This is still a messy job but it cleans them up nice. Pictures are before and after. Notice the white material is removed in the second picture.
Here is a picture of all the casting after sandblasting.
Now the sprues have to be cut off the bronze casting. I have found doing this with a hacksaw is the best way. I mount them in a vice and use a small hacksaw and cut them off one at a time by hand. This is a lot of hard work.
Close-up.
Here are all the cut bronze figurines. There are about 300 pieces here, all requiring hundreds of steps before they will be done. The next step is to separate and count them, then grind the bottoms flat. That will be in the next update.
Close-up.
Thanks for your interest. Any questions, please contact me. Consider starting a collection of fine art miniature bronze figurines. Go to my website to find a dealer.
Randall Zadar
Sculptor/ Zadar Studios
www.zadarstudios.com
email:
zadarstudios@juno.com
Call The Studio: 440-878-1474


Hello Randall,
ReplyDeleteYour techniques fascinate me. It great to see how you create your amazing artwork. You really are a very talented artist.
All the best,
Giac
Thanks Giac, Sometimes it can seem overwhelming with so many steps to complete but I like the casting process and I love bronze.
DeleteRandall